The Northern Circuit route (including variants thereof such as the Grand Traverse) is the only route which circumvents the peak on the northern slopes.
Kilimanjaro Uncovered
An Alternative Path to Bliss
Author: Alexandra Tanbai (page 3 of 5)
School Hut base camp (4,750m/15,600ft) to Uhuru Peak (5,895m/19,341ft)
Distance: 7km/4mi, 6-8 hours
Altitude: 1,100m/3,700ft up in elevation
Third Cave (3,800m/12,500ft) to School Hut base camp (4,750m/15,600ft)
Distance: 5km/3mi, 4-5 hours
Altitude: 950m/3,100ft up in elevation
Buffalo Camp (4,000m/13,200ft) to Third Cave (3,800m/12,500ft)
Distance: 8km/5mi, 3-5 hours
Altitude: 100m/400ft down in elevation
I was so scared of freezing during summit night that I spent the better half of a day doing nothing but researching the warmest possible gloves on the entire planet. To cut a long story short, Hestra Army Leather Mitt it had to be.
Gloves versus mittens
Theoretically, I dislike mittens and their associated loss of dexterity – impossible to grip anything! Practically, I suffer from poor blood circulation in my fingers when it gets really cold. I was looking out for some miraculous wonder gloves that might be as warm as the warmest mittens, but no one wanted to confirm my hopes. So it was my time for an epiphany moment: GLOVES WILL NEVER BE AS WARM AS MITTENS. Reluctantly but nevertheless, my fear eventually made me overcome my mitt aversion: MITTENS IT HAS TO BE!

Material
There seems to be no doubt that leather is the warmest outer material. Furthermore, make sure your gloves/mittens are windproof, waterproof and breathable. The wind during summit night is biting cold, all outer layers really need to be windproof or you will freeze, brrrr.
Other features
I also really like that the Hestra Army Leather Mitt come with a snow lock and pull strap with Velcro closure to keep them tight around my wrists so no heat would escape. Their handcuffs also are a very important feature because every now and then you’ll need to take off your mitts for more dexterity, and you will have more important things in your mind than worrying about losing them. What a nightmare if they were to go flying down the slope in the freezing dark!
Size matters
To make sure your gloves or mittens keep you as warm as possible, you want them to be a nice close fit. Hestra conveniently provides a printable size chart that I could just put my fingers on to identify my size from the convenience of my living room.
Layers matter
Even though the Hestra Army Leather Mitt are supposedly the warmest possible mittens available in the market, I would still want to have liner gloves underneath during summit night. They will keep you warmer, even if only just during the moments when you need to take off your mitts for dexterity.

Fortunately, there doesn’t seem to be too much difference between liner gloves in terms of functionality, just select a good price option. And no need to pay extra for touchscreen compatible index fingers – the material will get scratched from holding onto rocks and turn this feature useless in no time.

for maximum warmth. They will also be useful for other days or nights on the mountain when it gets really cold, but not cold enough for your mitts.
Self-heating badges for fingers?
Forget those self-heating badges. I brought a selection of heaps of those for fingers, toes and my back. They are completely unreliable. Either they don’t work at all, or they turn burning hot. I suggest you don’t want to rely on them but invest into some good lasting gear instead.
Did you find this helpful? Please share with others, or leave your comments below. Thank you!

Now I admit this selection was not based on my own research, but on expert advice. So here is why they are so cool, or what to watch out for in similar products:
- Foldable: can be stored easily in your daypack/carry-on luggage
- Carbon: ultra-light and cannot break
- Extended grip: easy to quickly grip up or down when the terrain changes (no need to adjust the total length)
- Adjustable length: for your height (your elbows should be roughly at a 90 degree angle)
Unfortunately, the LEKI Micro Vario Carbon Trekking Poles are also amongst the most expensive poles (if not the most expensive), but they seemed like a worthwhile investment to me. As they are carbon (which also makes them so expensive), they cannot break. So unless you lose them, they will last for a lifetime.
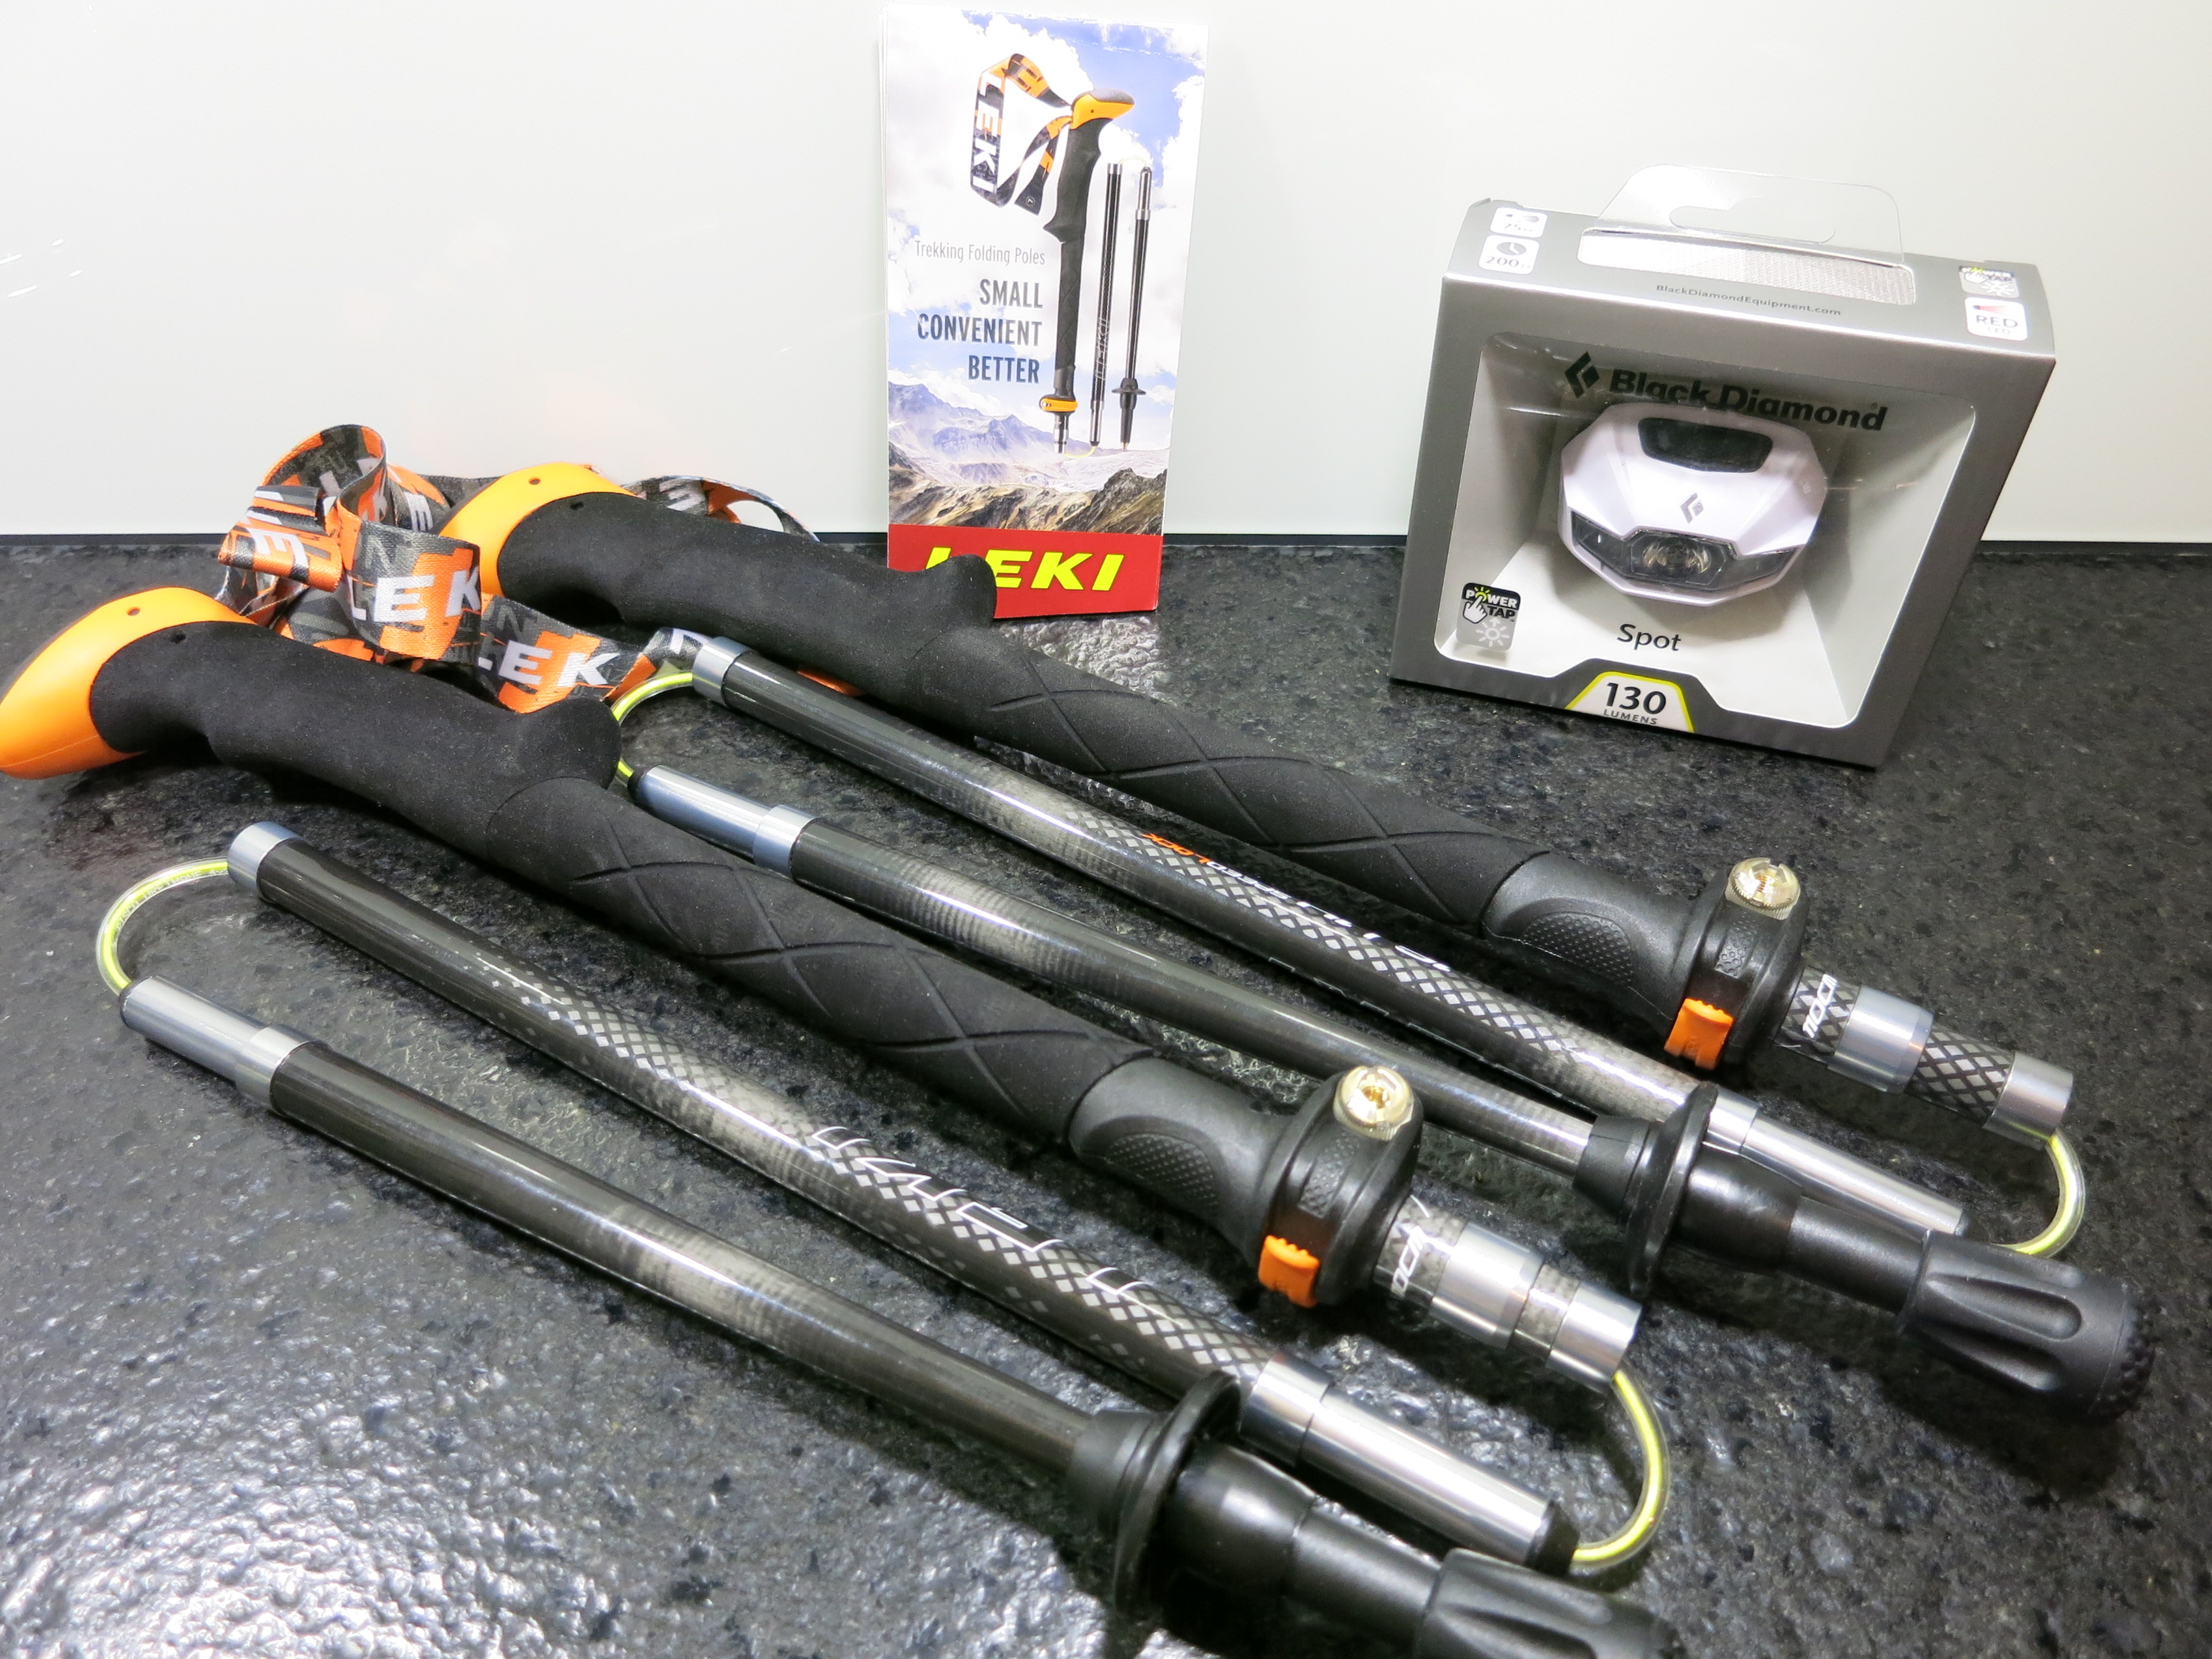
LEKI Micro Vario Carbon Trekking Poles
I spent an enormous amount of time organizing my gear. A complete gear list and packing checklist is available for you here. However, the list is only the first step, and it needs to be filled with specific product choices. Of course I only wanted the best of the best, and that’s why every option had to be researched to the last detail.
Here are some of the products that I used and would highly recommend. This is not an exhaustive list of your options, of course, but my own shortlist based on my own exhaustive research and conclusions, for my own use.
Note that my objective was to optimize for quality, not for price. Unfortunately, with outdoors gear, you are really paying for quality (more than just the brand), and quality has its price!
Hiking boots

I used Lowa Khumbu II GTX Trekking Boots and they were perfect for me. However, selecting the best hiking boots is a very individual affair and depends on the shape of your feet. Read more about what to watch out for when buying your own boots.
Hiking poles
I used LEKI Micro Vario Carbon Trekking Poles
and they were the absolute hit on my trip. I loved them, and also everyone else thought they were really cool. Read more what makes them so great and what to watch out for.

Gloves / mittens

. This was time well spent! Read more here how to keep your fingers warm.
More comprehensive recommendations and gear reviews will be added shortly. Stay tuned or send me a message if any questions meanwhile.
A good pair of hiking boots will undoubtedly be your most important purchase for Kilimanjaro, and the one purchase that you really shouldn’t get wrong. While other gear may be fairly standard and you can easily follow other people’s product recommendations or try to borrow from friends, this won’t work with hiking boots. While there are some standard guidelines to be followed, the model that works for you DEPENDS ON THE SHAPE OF YOUR FEET.
It may seem quite a daunting task at first to narrow down from a selection of dozens of seemingly similar models. However, there’s an easy short-cut: GET EXPERT ADVICE in a good outdoors store in your area.
I know it’s tempting to simply order everything online without leaving your living room (at least that was my default for most items), but please do yourself a big favour and DO NOT ORDER HIKING BOOTS ONLINE. Believe me, expert advice will be invaluable.
I was lucky to get such advice and it saved me a lot of troubles. Within minutes, my sales expert had narrowed down aisle after aisle of boots into only four pairs, and the ones he recommended to start with also turned out to be the best. However, it was not only a question of making the selection, but also of advising me what to watch out for while trying them on. Without his guidance, I would have gotten it all wrong. Neither did I know how to properly tie the laces (yes, there are special techniques), how to maintain their functionality, how to work with the right socks and insoles, and so forth.

and of course I would highly recommend them if they feel comfortable to you. However, what worked for me (narrow feet) may not work for you, so please don’t take this as blanket recommendation but watch out for the following:
General guidelines:
- Mid-height to protect your ankles
- Mid-weight for maximum efficiency (if too heavy, you end up dragging along excess weight which you do not need as you do no carry heavy bags; if too light, you need to use more muscle strength for stability)
- Gore-Tex material to keep dry
- Leather? I thought I would need full leather boots because I read they are also the warmest. However, bear in mind that leather reduces breathability and you also want your boots to work in hot climates where you start your hike, not only during summit night when it’s freezing cold. I was told it may be a better idea to work with socks and insoles in order to adjust for the climate. Furthermore, leather is also heavier than other materials, thus you would end up dragging along more weight. I was happy not to have full leather boots, and found mine to be so much more versatile and breathable.
Fitting guidelines:
- It all depends on the shape of your feet (narrow/normal/wide). You don’t want your boots to be too narrow (squeezing your feet), nor too wide (sliding around causes blisters and loss of head). The same makers/brands usually always follow a similar cut, so some of them (in my case most of them) might be out of the question for you. This is where expert advice really comes in handy. It would be difficult to find the right cut on your own.
- Buy your boots a size bigger than your normal shoe size. Try them on with thick thermal socks. You should still be able to tightly squeeze an index finger at the back.
- Try on your boots walking uphill and downhill (a good store should have a walking ramp). When walking downhill (and tied tightly at the ankles), your toes should not squeeze against the front.
Now do yourself a favour an visit your local outdoors store to find the right boots for you 🙂 You will also find more helpful guidance in my book.
Did you find this helpful? Please share with others, or leave your comments below. Thank you.
About

Top Posts


Please follow & like us :)
© 2026 Kilimanjaro Uncovered
Theme by Anders Noren — Up ↑