Kilimanjaro Uncovered

An Alternative Path to Bliss

Category: Gear

The best sleeping bag for Kilimanjaro

Updated: 18 December 2018

As you plan your trip to Kilimanjaro, the biggest thing you have to pay attention apart from safety and preventing death on Kilimanjaro is what to pack. While you are arranging all the things you plan on wearing on your Kilimanjaro climb like hiking boots and rain protection, don’t forget about planning what to wear when you sleep, including your sleeping bag. The most important function of your sleeping bag on Kilimanjaro is to keep you warm overnight in freezing temperatures. So the best sleeping bag is one that is rated for very low freezing temperatures. Most tour operators will provide you with the most suitable sleeping bag to rent during your Kilimanjaro climb, but be sure to ask in advance and prepare for the coldest temperatures.

How warm should your Kilimanjaro sleeping bag be?

Our operator offered the Mountain Hardwear Lamina Z Bonfire 30 Sleeping Bag for rent, which is rated for -30 degrees Fahrenheit (-34° Celsius). These sleeping bags kept us warm and were adequate for Kilimanjaro. They didn’t need to be any warmer, nor any cooler. None of us ended up sweating and, even if, keeping the sleeping bag zip open is a lesser pain than freezing. I personally would not hike Kilimanjaro with sleeping bags rated for anything less than -30 degrees.

However, given you are reading this, you probably have never had a need for such a high-performance sleeping bag, nor will you have so in future. Under normal circumstances, you would prefer your sleeping bag to be lighter and less bulky. Thus, it would be a real waste to buy a new sleeping bag just for one-time use on Kilimanjaro. Therefore, most people prefer to simply rent a sleeping bag from their operator.

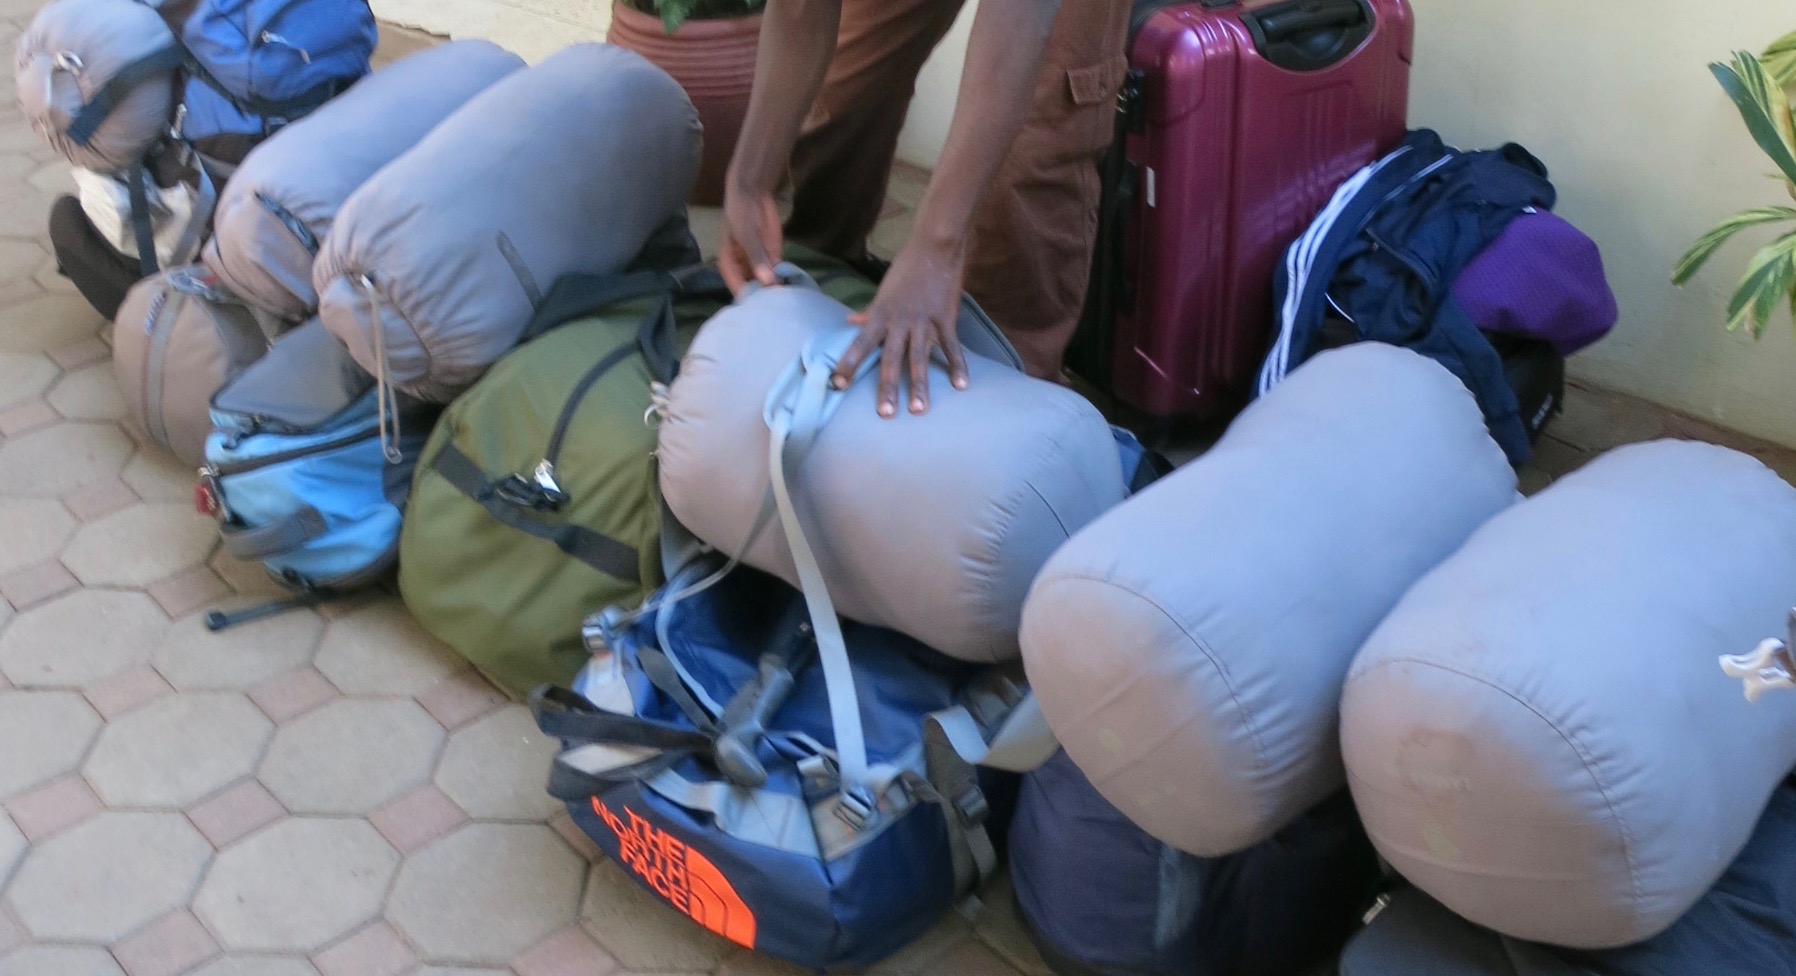
In our group of 12 hikers, 11 had come to that conclusion and rented the Mountain Hardwear Lamina Z Bonfire 30 Sleeping Bag from our operator. The only hiker who brought his own sleeping bag (also rated for minus degrees, yet not up to -30°) ended up cold overnight and regretted his decision not to rent in hindsight.

Rental sleeping bags

Best to rent your sleeping bag for Kilimanjaro from a high-quality operator

Beware of low-quality sleeping bags on Kilimanjaro climbs

However, beware! Not all operators offer high-quality equipment. In fact, most don’t. If in doubt, better check with them to confirm exactly the type of sleeping bag they would provide. Other than the model, also confirm their usage practices. It doesn’t help if they provide the best of all models but then use it over and over again. After about 10x washing, sleeping bags lose their functionality and will no longer keep you as warm as they should. Read more about operator selection criteria on this blog, and about the shockingly poor sleeping bag practices of budget operators in my book.

Sleep without socks in your sleeping bag on Kilimanjaro

Finally, a counter-intuitive piece of advice: Sleep without socks to avoid getting cold feet! Yes, I know, that doesn’t sound right. I resisted for several nights, experimenting with air activated feet warmers, or self-heating badges, and two pairs of thick thermal socks instead. Nothing worked; my feet felt like ice every single night. Finally, I followed my guide’s advice to sleep bare feet, and—lo and behold—my feet felt warm and cozy all night long!

Wishing you a great experience climbing Kilimanjaro!

5 Kilimanjaro accessories that you will wish someone had told you about

1. Thermos – YES!!!

I strongly believe that a Thermos should be on everyone’s kit list. From hot water warming your body when it’s really cold to a steaming hot towel in the morning, I promise you will love it. It’s absolutely worth the extra weight. Read more about all its fantastic uses on Kilimanjaro here.

2. Solar charger – MAYBE

In our age of gadget addiction, solar panels have become unbelievably popular on Kilimanjaro. They are definitely worth the money if you plan to use your phone a lot, as I did to write my book! My panels worked like a charm and I absolutely loved them. However, they are a total overkill under normal circumstances. If just to take photos on your phone, you might want to invest the money into a decent camera instead. For most people, solar panels will end up in their cellars and never be used again. What a waste just for one trip!

3. Self-heating hand and toe warmers – NO!

Freezing overnight in my tent and during summit night was my biggest fear about Kilimanjaro. Of course I made sure to bring a stack of self-heating badges, i.e. air activated warmers that supposedly heat up as soon as you have opened the packaging and stay warm for several hours thereafter. I brought special hand warmers to put inside my gloves, toe warmers to stick to my socks, and even big warmers for my back. Conclusion: All of them were totally unreliable and – as a result – completely useless. The few instances they worked, they were far too hot. And when I most needed them, i.e. during summit night when I could no longer feel my fingers and toes, they didn’t work at all! I highly recommend you to invest in proper gear instead, like warm gloves and mitts, and a good pair of warming insoles.

4. Mid-layer fleece gloves – YES!

Most gear lists recommend liner gloves as an optional item. Scared as I was about freezing, of course I made sure to bring glove liners in addition to the warmest mittens on the market.  However, that was not enough. I often wished I had another pair of warm fleece gloves, as an experienced hiker in our group was smart enough to bring along. The benefit of thicker fleece gloves is to keep you warmer than thin liner gloves whilst providing more dexterity than clumsy mittens. I would have loved to have some during cold nights in my tent as well as while hiking in cloudy weather when my liner gloves were not thick enough to keep me warm. Most of all, I really wished I had brought some during summit night as a third pair of mid-layer gloves to keep my fingers warmer. Yes, three pairs of gloves/mittens on top of each other – that’s my strong recommendation for summit night (unless you enjoy a miraculous blood circulation)!

5. FUD – NO!

This is for women only. Surely you must have wondered how you will be able to pee in privacy. Blogs warn that at higher altitudes there might be nowhere to hide behind. Marketeers have jumped on this opportunity and come up with FUDs, short for Female Urination Devices. They promise the impossible: pee while standing, just like men. Theoretically, sounds great. Practically, I haven’t seen a single woman using them, nor was there any need to do so. Other than close to the summit, we always found rocks to hide behind; and even summit day won’t cause you any problems because you won’t drink much during summit night in any case. More about that here. So, ladies, no need to worry. You will be fine!

Do you have  any other insights worth sharing? Or do you have any unanswered questions in order to prepare your own climb? Please leave your comments below.

5 reasons why you should bring a Thermos to Kilimanjaro

There’s a lot of different kit lists floating around. When checking two or three of them, you can be reasonably certain that all essential items have been covered on one or the other. But for one key item: A Thermos. It remains a mystery to me why this marvel of functionality hasn’t yet made it onto any other Kilimanjaro kit lists; but of course I’ve included it onto the packing and checklist that I’ve compiled for you. Here’s why I would HIGHLY recommend a Thermos to EVERY Mt Kilimanjaro hiker:

1. Liquid water during summit night

All reviews I had read concurred: Your water will freeze during summit night. Yikes – what to do? The answer seemed obvious. This was my initial reason why – contrary to lack of recommendations from other sources and despite the additional weight – I decided to bring a Thermos onto Kilimanjaro. Ironically, this initial reason would prove to be the least important of all functionalities. It was all the other unexpected benefits that would make me such a staunch Thermos advocate.

Of course, it turned out to be true that all water bladders  would freeze during summit night. Fortunately, I hadn’t been aware that there was a very easy workaround: Use a Nalgene bottle and carry it upside down. That way, your water will freeze from the upside-down bottom. When you drink, you simply turn it around. This little trick should leave you with a sufficient supply of liquid water throughout summit night.

Furthermore, I only realized during summit night that hydration is over-rated for your final summit push. In fact, it’s not only not necessary, but also completely impractical. Just imagine yourself wrapped in layers of pants and your hands covered by warm gloves or mittens that hopefully keep you warm in a freezing wind. Now imagine exposing your fingers to that freezing wind, pulling down all your layers that will sit tightly on top of each other, and making the effort to squat in thin air. OK, guys might have a small advantage, but it won’t be a pleasant experience for them either!

So what about necessity? Yes, drinking is imperative to stay clear of altitude sickness; but no, you don’t need to drink much during summit night. On the one hand, you simply won’t feel that thirsty when it’s freezing cold, so rest assured you won’t be suffering from thirst. On the other hand, all the prior summit successes – most of whom didn’t have much to drink – provide ample evidence that you can reach the summit safely without constantly re-hydrating during that final push. Better make sure to drink your three liters of water every day before summit night!

2. Hot water to warm your body during summit night

While drinking for hydration wasn’t such a big deal, drinking to warm up from inside was absolutely wonderful during that freezing cold summit night. Even if just for that reason, I would always carry a Thermos again to the top of Kilimanjaro.

3. Hot water to keep warm in a freezing cold tent

The same logic not only applies to summit night, but all those cold nights that you spend in your tent. Being able to drink hot water last thing before you close your eyes or first thing in the morning really helps to warm your body and feel more comfortable when stuck in a tent that at times may feel like an icebox.

4. Hot water in the morning to facilitate bowel movement

Most people will have problems with their digestive system on Kilimanjaro, especially if you are used to eating lots of fibre that you won’t get on the mountain. In order to prevent your bowels from clogging up too much, drinking hot water first thing in the morning helps a lot.

5. Hot water in the morning to wash your face

Last but not least, here’s my absolute favorite use of a Thermos: Do you know those small steaming hot towels they serve you on planes? Wouldn’t it be wonderful to have one of those served to you when you wake up in a freezing cold tent on the mountain? That’s exactly what my Thermos did for me. I just poured a tiny little bit of hot water that I kept overnight into my Thermos cup and dropped in one of those compressed single-use towels (also highly recommendable). Then wait for a minute and let the magic unfold. Abracadabra – that tiny token will soak up the water and expand into a steaming hot towel! With this set-up, you can “wash” yourself and get fully ready for the day all within the warm comfort of your sleeping bag! Pretty cool, huh?

Now you know my secret that helped me enjoy my hiking and camping experience all the way to the top of Kilimanjaro. Please share and spread the word!


Complete packing and gear checklist for climbing Mount Kilimanjaro

Have you noticed that most gear lists are either incomplete, or in a format that requires manually copying the contents into your own checklist? That’s the experience I’ve made, and that’s why I have prepared this comprehensive and fully editable checklist for you. It includes all the gear, accessories, toiletries, documents, medication and other items that you may want to organize and pack for Tanzania and bring onto Mt Kilimanjaro. For each item, I have also indicated my assessment whether I would personally carry them onto Kilimanjaro (again), based on my actual climbing experience.

Kilimanjaro gear list / kist list / packing list / checklist

View online & print: Kilimanjaro packing list—PDF

To make it easier for you to adjust the list for your own purposes and keep track while organizing all your gear, you can download the fully editable Excel version below. The XLS file also includes further comments and explanations to help you with your own assessment.

Download & edit: Kilimanjaro packing list—XLS

I hope my Kilimanjaro gear list will help you save time with your own preparations. Do you find this useful? Or were you looking for something else? Please leave your comments below.


Downloads

Complete Kilimanjaro gear list


View online & print: Kilimanjaro packing list – PDF

Download & edit: Kilimanjaro packing list – XLS

chili-feet warming insoles

When organizing my Kilimanjaro hike, I was obsessed by one major concern: How to keep warm feet (or rather how to avoid frostbite) during summit night? Fear turned into excitement when I learned about chili-feet from a real outdoors expert. According to him and all my further research, they are the warmest insoles currently in the market. In essence, their innovative material produces heat purely from the pressure of walking. How wonderful would that be: Just put them into your shoes and no more cold feet when walking in winter!

Continue reading

Gloves or mittens

I was so scared of freezing during summit night that I spent the better half of a day doing nothing but researching the warmest possible gloves on the entire planet. To cut a long story short, Hestra Army Leather Mitt it had to be.

Gloves versus mittens

Theoretically, I dislike mittens and their associated loss of dexterity – impossible to grip anything! Practically, I suffer from poor blood circulation in my fingers when it gets really cold. I was looking out for some miraculous wonder gloves that might be as warm as the warmest mittens, but no one wanted to confirm my hopes. So it was my time for an epiphany moment: GLOVES WILL NEVER BE AS WARM AS MITTENS. Reluctantly but nevertheless, my fear eventually made me overcome my mitt aversion: MITTENS IT HAS TO BE!

Material

There seems to be no doubt that leather is the warmest outer material. Furthermore, make sure your gloves/mittens are windproof, waterproof and breathable. The wind during summit night is biting cold, all outer layers really need to be windproof or you will freeze, brrrr.

Other features

I also really like that the Hestra Army Leather Mitt come with a snow lock and pull strap with Velcro closure to keep them tight around my wrists so no heat would escape. Their handcuffs also are a very important feature because every now and then you’ll need to take off your mitts for more dexterity, and you will have more important things in your mind than worrying about losing them. What a nightmare if they were to go flying down the slope in the freezing dark!

Size matters

To make sure your gloves or mittens keep you as warm as possible, you want them to be a nice close fit. Hestra conveniently provides a printable size chart that I could just put my fingers on to identify my size from the convenience of my living room.

Layers matter

Even though the Hestra Army Leather Mitt are supposedly the warmest possible mittens available in the market, I would still want to have liner gloves underneath during summit night. They will keep you warmer, even if only just during the moments when you need to take off your mitts for dexterity.

Fortunately, there doesn’t seem to be too much difference between liner gloves in terms of functionality, just select a good price option. And no need to pay extra for touchscreen compatible index fingers – the material will get scratched from holding onto rocks and turn this feature useless in no time.

In hindsight, I would also bring a third pair of mid-layer fleece gloves for maximum warmth. They will also be useful for other days or nights on the mountain when it gets really cold, but not cold enough for your mitts.

Self-heating badges for fingers?

Forget those self-heating badges. I brought a selection of heaps of those for fingers, toes and my back. They are completely unreliable. Either they don’t work at all, or they turn burning hot. I suggest you don’t want to rely on them but invest into some good lasting gear instead.

Did you find this helpful? Please share with others, or leave your comments below. Thank you!

Best hiking poles for Kilimanjaro and elsewhere

I used the LEKI Micro Vario Carbon Trekking Poles. They were an absolute hit on my hike. I loved them, and also everyone else thought they were really cool.

Now I admit this selection was not based on my own research, but on expert advice. So here is why they are so cool, or what to watch out for in similar products:

  • Foldable: can be stored easily in your daypack/carry-on luggage
  • Carbon: ultra-light and cannot break
  • Extended grip: easy to quickly grip up or down when the terrain changes (no need to adjust the total length)
  • Adjustable length: for your height (your elbows should be roughly at a 90 degree angle)

Unfortunately, the LEKI Micro Vario Carbon Trekking Poles are also amongst the most expensive poles (if not the most expensive), but they seemed like a worthwhile investment to me. As they are carbon (which also makes them so expensive), they cannot break. So unless you lose them, they will last for a lifetime.

LEKI Micro Vario Carbon Trekking Poles

LEKI Micro Vario Carbon Trekking Poles

Gear for climbing Mount Kilimanjaro

I spent an enormous amount of time organizing my gear. A complete gear list and packing checklist is available for you here. However, the list is only the first step, and it needs to be filled with specific product choices. Of course I only wanted the best of the best, and that’s why every option had to be researched to the last detail.

Here are some of the products that I used and would highly recommend. This is not an exhaustive list of your options, of course, but my own shortlist based on my own exhaustive research and conclusions, for my own use.

Note that my objective was to optimize for quality, not for price. Unfortunately, with outdoors gear, you are really paying for quality (more than just the brand), and quality has its price!


Hiking boots 

I used Lowa Khumbu II GTX Trekking Boots and they were perfect for me. However, selecting the best hiking boots is a very individual affair and depends on the shape of your feet. Read more about what to watch out for when buying your own boots.


Hiking poles

I used LEKI Micro Vario Carbon Trekking Poles and they were the absolute hit on my trip. I loved them, and also everyone else thought they were really cool. Read more what makes them so great and what to watch out for.


Gloves / mittens

I was so scared of freezing during summit night that I spent the better half of a day doing nothing but researching the warmest possible gloves on the entire planet. My conclusion: Hestra Army Leather Mitt. This was time well spent! Read more here how to keep your fingers warm.


More comprehensive recommendations and  gear reviews will be added shortly. Stay tuned or send me a message if any questions meanwhile.

The best hiking boots for Kilimanjaro

A good pair of hiking boots will undoubtedly be your most important purchase for Kilimanjaro, and the one purchase that you really shouldn’t get wrong. While other gear may be fairly standard and you can easily follow other people’s product recommendations or try to borrow from friends, this won’t work with hiking boots. While there are some standard guidelines to be followed, the model that works for you DEPENDS ON THE SHAPE OF YOUR FEET.

It may seem quite a daunting task at first to narrow down from a selection of dozens of seemingly similar models. However, there’s an easy short-cut: GET EXPERT ADVICE in a good outdoors store in your area.

I know it’s tempting to simply order everything online without leaving your living room (at least that was my default for most items), but please do yourself a big favour and DO NOT ORDER HIKING BOOTS ONLINE. Believe me, expert advice will be invaluable.

I was lucky to get such advice and it saved me a lot of troubles. Within minutes, my sales expert had narrowed down aisle after aisle of boots into only four pairs, and the ones he recommended to start with also turned out to be the best. However, it was not only a question of making the selection, but also of advising me what to watch out for while trying them on. Without his guidance, I would have gotten it all wrong. Neither did I know how to properly tie the laces (yes, there are special techniques), how to maintain their functionality, how to work with the right socks and insoles, and so forth.

I bought my hiking boots at my first store visit (no need for multiple trips back and forth if you have good advice) and never got any blisters from the start. In my case, they were Lowa Khumbu II GTX Trekking Boots and of course I would highly recommend them if they feel comfortable to you. However, what worked for me (narrow feet) may not work for you, so please don’t take this as blanket recommendation but watch out for the following:

General guidelines:

  1. Mid-height to protect your ankles
  2. Mid-weight for maximum efficiency (if too heavy, you end up dragging along excess weight which you do not need as you do no carry heavy bags; if too light, you need to use more muscle strength for stability)
  3. Gore-Tex material to keep dry
  4. Leather? I thought I would need full leather boots because I read they are also the warmest. However, bear in mind that leather reduces breathability and you also want your boots to work in hot climates where you start your hike, not only during summit night when it’s freezing cold. I was told it may be a better idea to work with socks and insoles in order to adjust for the climate. Furthermore, leather is also heavier than other materials, thus you would end up dragging along more weight. I was happy not to have full leather boots, and found mine to be so much more versatile and breathable.

Fitting guidelines:

  1. It all depends on the shape of your feet (narrow/normal/wide). You don’t want your boots to be too narrow (squeezing your feet), nor too wide (sliding around causes blisters and loss of head). The same makers/brands usually always follow a similar cut, so some of them (in my case most of them) might be out of the question for you. This is where expert advice really comes in handy. It would be difficult to find the right cut on your own.
  2. Buy your boots a size bigger than your normal shoe size. Try them on with thick thermal socks. You should still be able to tightly squeeze an index finger at the back.
  3. Try on your boots walking uphill and downhill (a good store should have a walking ramp). When walking downhill (and tied tightly at the ankles), your toes should not squeeze against the front.

Now do yourself a favour an visit your local outdoors store to find the right boots for you 🙂  You will also find more helpful guidance in my book.

Did you find this helpful? Please share with others, or leave your comments below. Thank you.